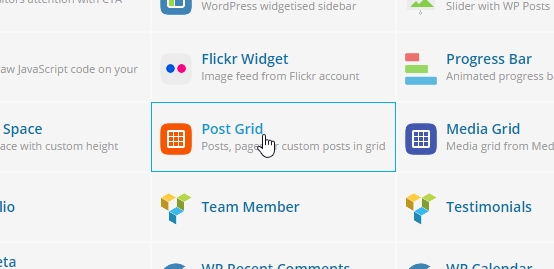
The Post Grid element is one of the available Visual Composer elements that you can add to a page. You can use it to show your blog posts or any other data source such as pages or custom post types. It is usually useful when you want to display the posts of specific categories along with normal page content other than using only the default blog page.
Today we are going to show you how to use the element to display blog posts using our Thine theme.
Requirements
- Thine WordPress theme
- Visual Composer plugin
Let’s Start
- Create a new page.
- On the page edit screen, click on the Backend Editor button. The button will enable the editor of Visual Composer.

- Click the Add Element button and select Post Grid in the element list to add it to the page content.

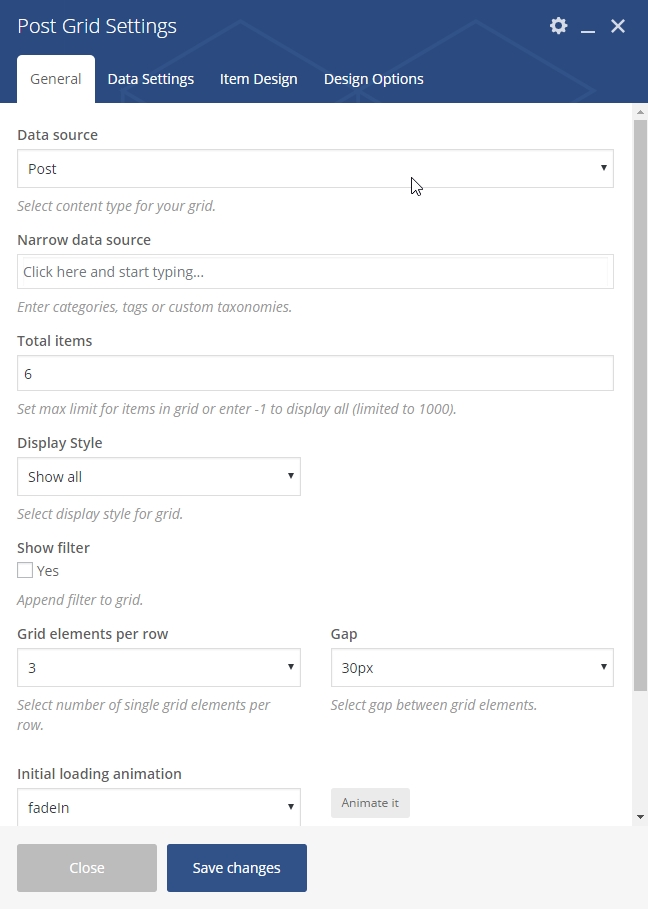
- You will see the setting panel of the element. This is where you can specify the settings of the element such as what data source to use, how many items to display, which design to use, etc. You will find these tabs in the panel.
- General Tab – This tab contains the main settings of the element. In this case, we want to display blog posts, so we select the Data Source as “Post.” We want only six posts, so we enter “6” in the Total Items field. We also want to make it three lines per row, so we select “3” for the “Grid elements per row” setting.

- Data Settings Tab – You can use this tab to manage the order of the posts (or filter some). We want to display our six latest posts, so we set the Order By setting as “Date” and Sort Order as “Descending.”
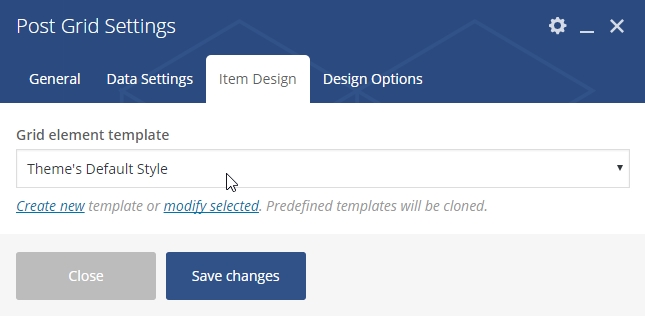
- Item Design Tab – Visual Composer comes with some pre-built templates for the element that you can choose from in this tab. However, the styles of the pre-built templates might not work well with the overall design of your website. So, we have provided you a basic template that fit with the theme design.If you imported our dummy data XML file that is included in the purchased package, you should be able to find the “Theme’s Default Style” value in the template list under this tab. Otherwise, you can separately import the “vc-post-grid-only.2016-09-24.xml” file which is also provided in the package. After importing, you should see “Theme’s Default Style” available in the list.
 Note: If you cannot find the “vc-post-grid-only.2016-09-24.xml” file in the package, please go to the Downloads page on ThemeForest to get the latest full package of the theme.
 - Design Options Tab – We do not want any custom design adjustment for the element, so we leave them unchanged.
- General Tab – This tab contains the main settings of the element. In this case, we want to display blog posts, so we select the Data Source as “Post.” We want only six posts, so we enter “6” in the Total Items field. We also want to make it three lines per row, so we select “3” for the “Grid elements per row” setting.
- Click “Save Changes” to save all the settings of the element. Then save the page.
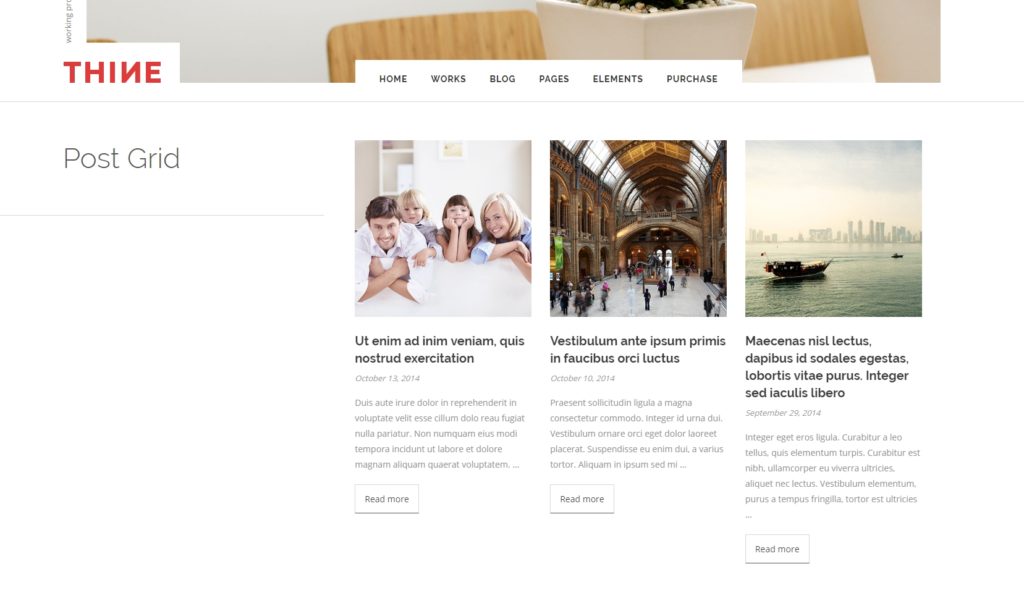
- When viewing on the front end, the element will be displayed like the image below.

Conclusion
The Visual Composer Post Grid element is an easy way to display your blog posts on a page. Whether they are the posts from all or specific categories, you can choose that in the setting panel of the element. You can also create a new design template for the element using the “Visual Composer > Grid Builder” menu if none of the existing ones work well with your site. We will talk about that in another article.
Want more articles like this or want to know more about the theme features? Feel free to send us your feedback on our Contact page.

