The sidebars or widget areas are a great functionality for displaying secondary page content in WordPress. But what if your site has many pages and some page needs to have specific content in the sidebar?
In this article, we are going to tell you step-by-step for how to create new custom sidebars and assign them to pages using the Simple Page Sidebars plugin.
Requirements
- For the demonstration in this article, we use our Thine WordPress theme as a base theme. If you are using a theme from another provider, you can also use the same instruction if the theme supports the use of sidebars on pages.
- Simple Page Sidebars plugin
Let’s Start
1. First, you would have to install and activate the Simple Page Sidebars plugin. Go to “Plugins > Add New” on your WordPress admin panel, type “Simple Page Sidebars” in the box and click the Install button after it comes up. Then click the Activate button.

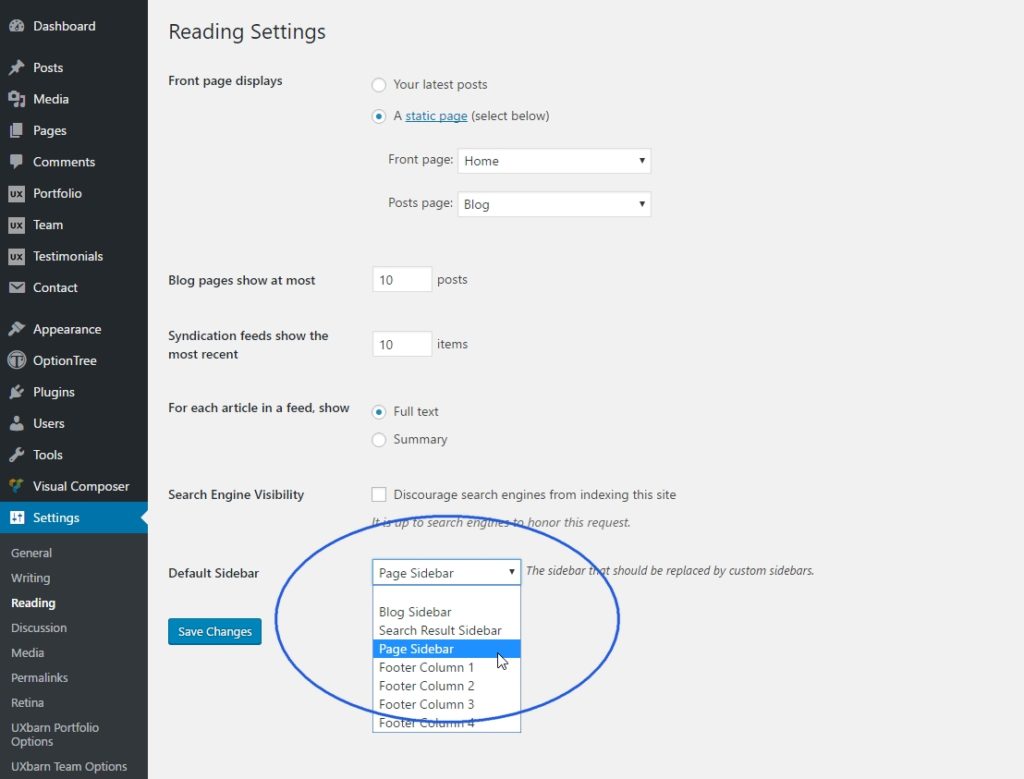
2. Go to “Settings > Reading” and there will be a new option named “Default Sidebar” showing up at the bottom of the page. This option means that the plugin needs to know which sidebar in the theme is the one to be replaced by its custom sidebars.
For example, in the Thine theme, there are seven sidebars available which are:
- Blog Sidebar
- Search Result Sidebar
- Page Sidebar
- Footer Column 1
- Footer Column 2
- Footer Column 3
- Footer Column 4
By default, the sidebar that will be used on pages is the Page Sidebar. If you go to “Appearance > Widgets” and put some widgets into the Page Sidebar, they will be visible on every page.
Yes, with the help of the Simple Page Sidebars plugin, you will be able to create new custom sidebars and assign them to some specific pages that need different widget display.
Now, back to the setting page, select “Page Sidebar” in the drop down list.
3. Go to the Pages menu and open the pages you want to use custom sidebars. In this case, we want to display information about our services on both Services and Our Team pages.
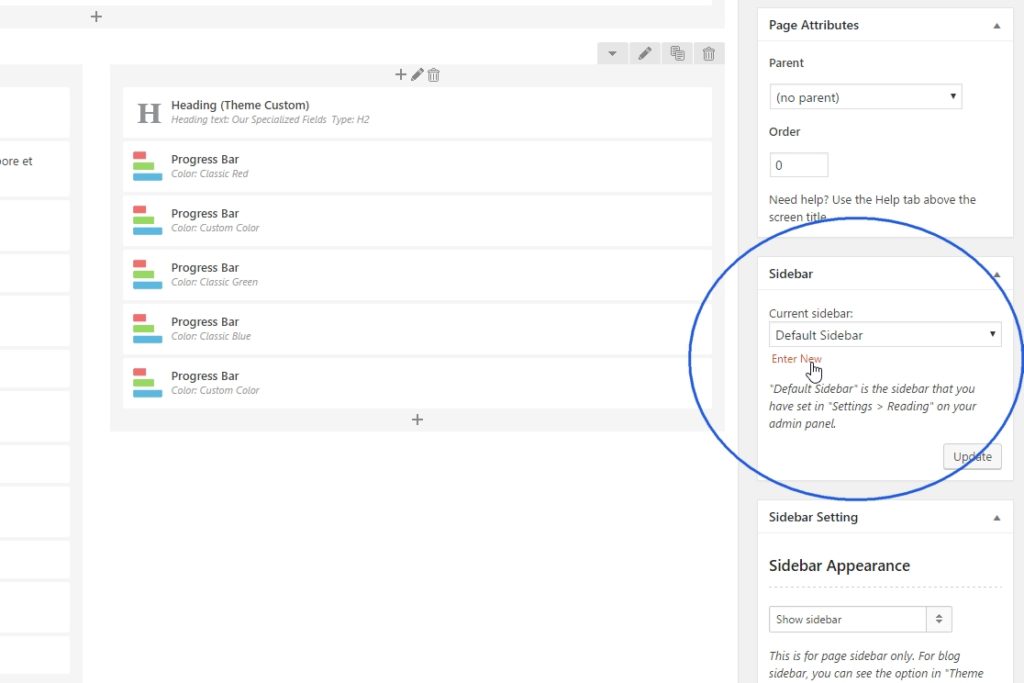
Start with the Services page, open the edit screen of the page and look at the right side of the screen, you will see a box named “Sidebar” like the screenshot below.
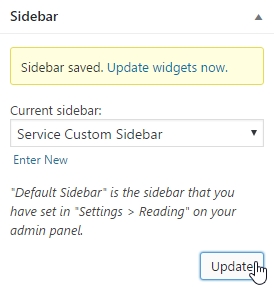
This box belongs to the plugin, and it has Default Sidebar selected by default. To create a new custom sidebar, click the “Enter New” link under the drop down list. We will name our new sidebar as “Service Custom Sidebar.” Click the Update button to save the sidebar.
Additional Steps for the Thine Theme: On the page edit screen, select the “Use and Display Side Content?” as “Off.”
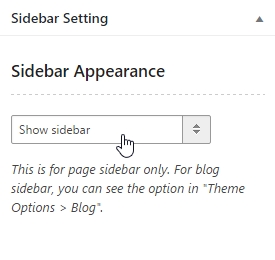
Also, make sure to select “Show Sidebar” in the Sidebar Setting box that is right below the Sidebar box.
4. Once the sidebar is saved, it will be available in the sidebar list on the “Appearance > Widgets” page. You can then add widgets to it. We just added a Text widget with some dummy information like the screenshot below. And do not forget to click the Save button of the widget!
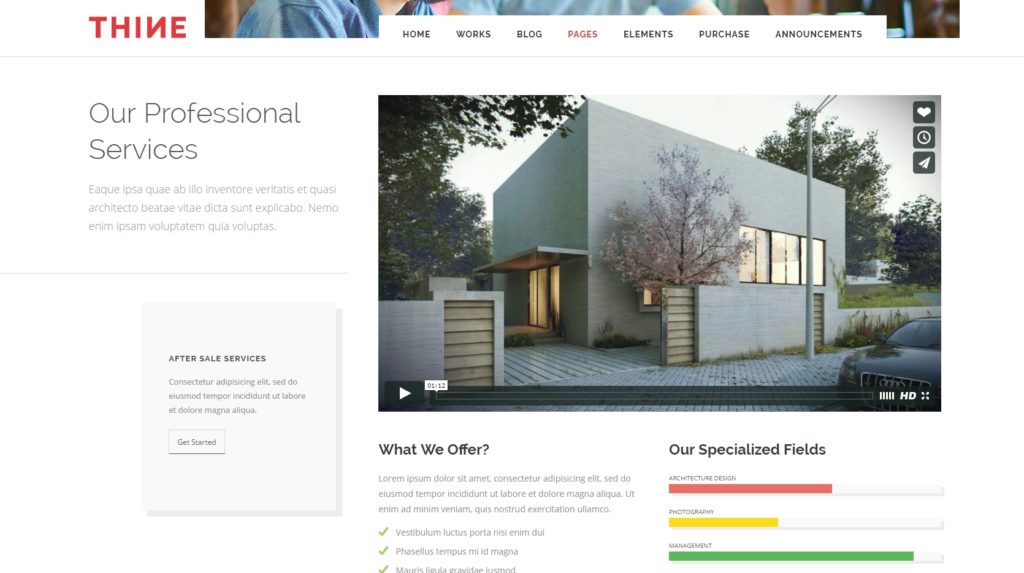
5. If you view the Services page now, you will see that the new sidebar is displaying successfully.
6. We also want to display the same sidebar on the Our Team page. So, we do that by opening the edit screen of the Our Team page then select the “Service Custom Sidebar” in the Sidebar box and click Update.
Deleting Custom Sidebars
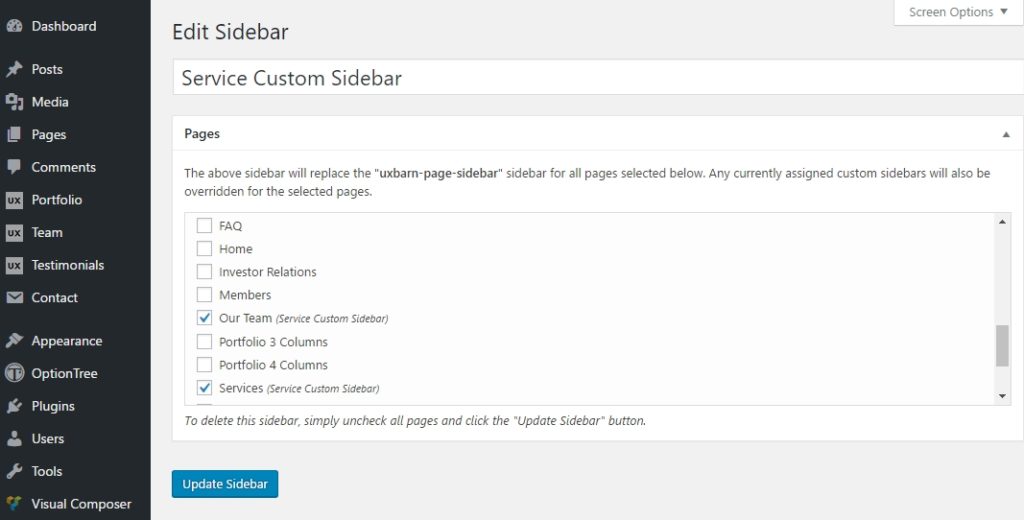
To completely delete the created custom sidebars, you just need to open the Pages menu then you will see a Sidebar column in the page table. In this column, you will see the name of the custom sidebars you created and assigned to pages. Click on the name and you will see a screen like this:
Uncheck all items and click the Update Sidebar button and the custom sidebar will be removed from all the pages and on the Widgets page.
Conclusion
Custom sidebars are useful when you want to display specific sidebar content on some pages that are different from all other pages. With the help of the Simple Page Sidebars plugin, it is very easy to create a custom one to be used on those particular pages. We hope this article could help you on how to use the plugin.
Want more articles like this or want to know more about the theme features? Feel free to send us your feedback on our Contact page.

